Click here for How To Take Group Payments
Click here for How to Correct Transactions that were Offset Wrong
Click here for Groups Navigation
| Group Functions | |
|---|---|
| Add | Payment |
Overview
Payments are applied from groups with either the autopay or manual pay methods. However, autopay is required when using Balance Forward statements. Manual pay is only available for Open Item groups. Transactions can be posted to past dates for master accounts, which impacts that date's accounting information on the Internal Audit. Transactions for future dates CANNOT be posted to master accounts. The Group Name, Payment Date, Group#, and Balance are displayed based on the selected group.
- View Transactions
- Click to open the Transaction tab and view transactions for the selected group master.
- Autopost a Payment to the Oldest Open Transactions
- Post a payment and automatically apply it against open transactions. Autopost should only be used with balance forward masters. Select the posting date for this transaction. The current RDP system date is the default setting. Any customer using open item statements should never use auto-post.
- Manually Post a Payment to Specific Open Transactions
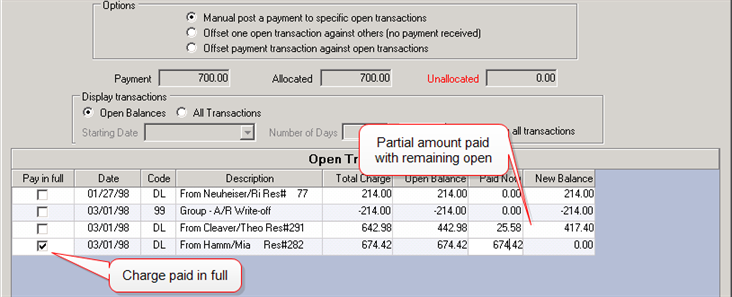
- Post a payment and allocate the payment against one or more open transactions. Manual post must be used with open item statements. With this option selected, the payment amount entered must be applied to selected transactions. When the payment is applied for the full amount, that transaction is removed from the Open Item statement. If a partial amount is applied, then the remaining amount shows as open on the statement.
- Offset One Open Transaction Against Others (No Payment Received)
- The offset option is used with open item statements to offset one open transaction against others without receiving a payment. For example, assume a commission of $10 was erroneously processed for a reservation to the group master. A correction is manually posted to the group master. Both of these transactions would show on the open item statement. The offset mode is used to apply one transaction against another, thus removing both transactions from the open item statement. The offset mode should never be used with balance forward statements.
- All Transactions - Correct Offset to Wrong Transaction
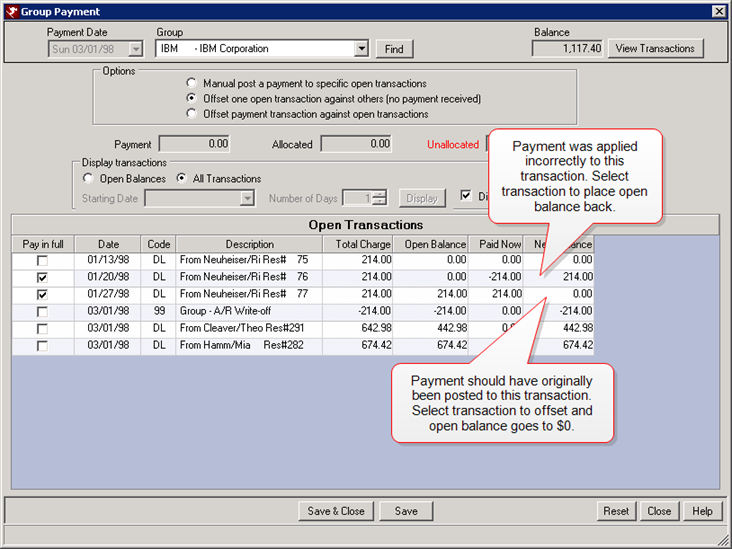
- Select the Show All Transaction radio button to display transactions that are no longer open. If the Display All Transactions box is unchecked, enter the Starting Date and Number of Days, then click Display. Select the transaction that was incorrectly offset and select the transaction that should be offset. This places the open balance amount back on the incorrect transaction and changes the other to 0. The Unallocated field should be 0 before saving. This feature is useful when a payment was applied to the incorrect transactions.
- Offset Payment Transaction Against Open Transaction
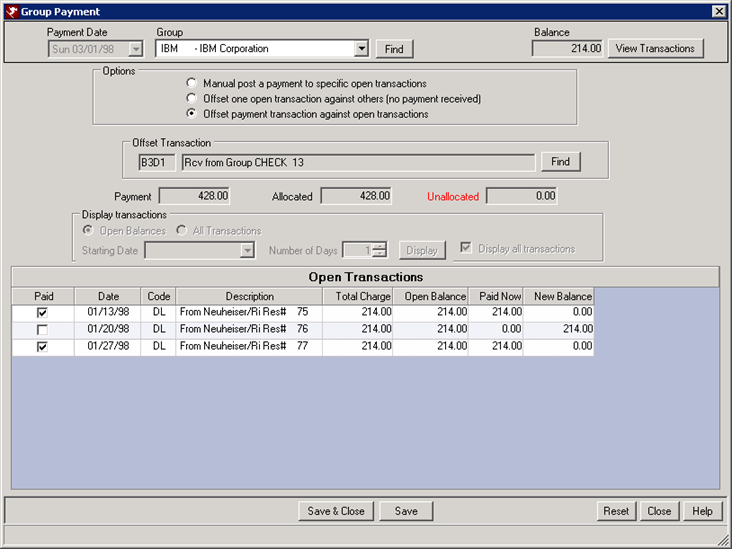
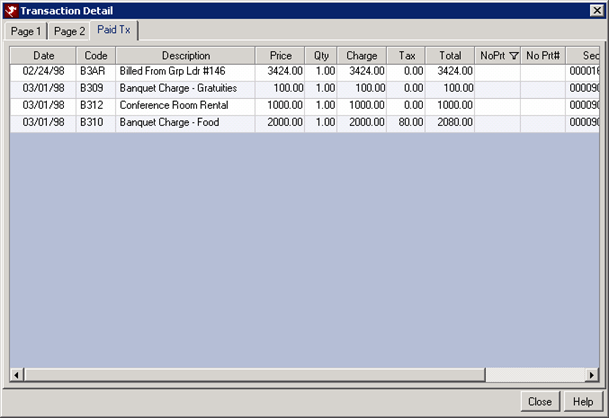
- By selecting this option, the system allows payments that were offset against specific open transactions to be corrected and applied to different transactions. The transactions that were applied to the payment display on the Paid Tx tab of the payment transaction detail. When this option is selected, find the appropriate payment transactions.

- The select the transactions from the list to apply to the payment. The transactions that were originally applied will be checked by default. Uncheck them as needed and select the appropriate transactions.
- Credit Card
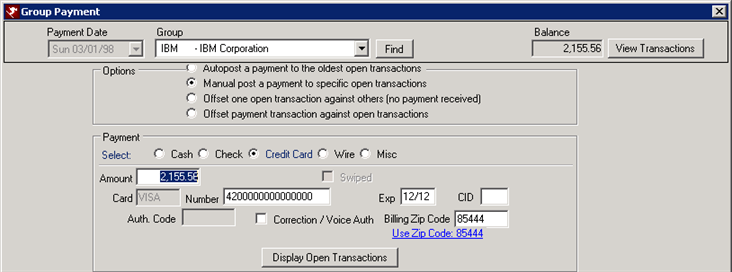
- Select the Credit Card radio button to indicate a credit card payment received from the group. See credit card detail for information on credit card fields available.
- Cash
- Select the Cash radio button and enter the Amount of the
cash payment received from the group.
- Check
- Select the Check radio button to indicate a check received from the group. See check detail for information on check fields available.
- Misc
- Select the Misc radio button to indicate a different type of payment has been received from the group such as a certificate or credit. Enter the Amount and use the Description field to provide detail for accounting purposes.
- Wire
- Select the Wire radio button to indicate a wire payment received from the group. Enter the Amount received. The wire must be made through traditional bank wiring services, but this option allows RDP to track the payment for accounting purposes.
Take Payments from Multiple Groups
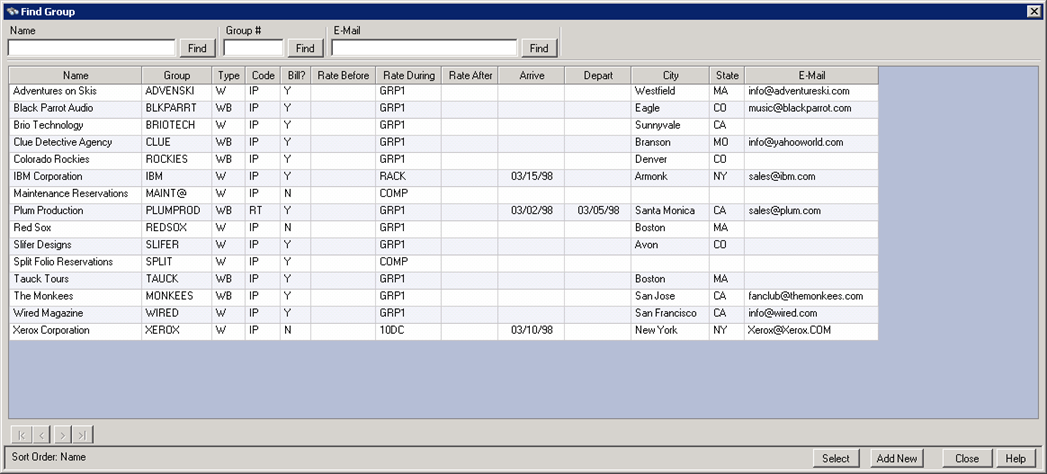
- Find Group
- When the Payment screen is open, use the Find Group button to
select a group and take a payment. Once complete, use the Find
Group button to select another group and take a payment. This
process allows for taking payments from multiple groups without closing
the Payment screen.
Paid Tx Tab - Payment Cross Reference
- When the Payment screen is open, use the Find Group button to select a group and take a payment. Once complete, use the Find Group button to select another group and take a payment. This process allows for taking payments from multiple groups without closing the Payment screen.
- Correcting Payment Offset
- For step by step instructions, see How to Correct Transactions that were Offset Wrong.
- If a payment was offset against a transaction incorrectly, this can be corrected from the Payment option. Choose the Offset Payment Against Open Transactions. Click the Find button and select the payment. Place a check in the Paid box next to the correct transactions, and uncheck the incorrect transactions. Once the payment has been allocated properly, click Save and Close. The Paid Tx tab should reflect the change in allocation.


Click these links for Frequently Asked Questions or Troubleshooting assistance.
05/31/2012
© 1983-2012 Resort Data Processing, Inc. All rights reserved.