| Topics Available | |
|---|---|
|
Confirm One (Reporter Only Mode) |
E-mail Masters (Guests, Groups, Owners, and Travel Agents) |
Overview
Confirmations can be manually printed and/or e-mailed to multiple
recipients based on special parameters or by master type. Select Confirmations from the Reporter
-> Mass E-mail menu, and then select
a tab pertaining to which filter (by deposit due, received, etc.) should be used to
send bulk e-mails. These tabs create confirmations for particular
groups based on a particular filters. Print a confirmation or display a list of e-mail recipients with
or without valid e-mail addresses.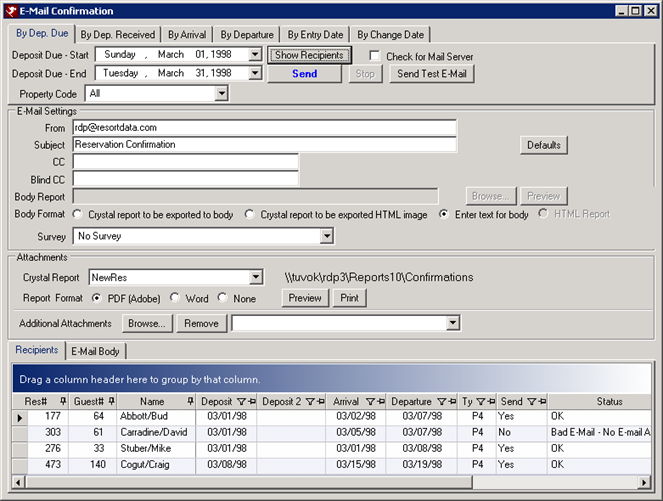
E-mail Confirmation Header Area
E-mail confirmations are only sent to those with valid e-mail addresses. Complete the required settings click the Send E-mail button to send. For assistance sending confirmations to masters such as owners or groups, see For assistance with the grid, please see Grid.
- Find Res (Default/Send One Confirmation Only)
- When sending just one e-mail confirmation, click the Find Res button to select which guest will receive the e-mail. For additional help, see Find Res.
- Change E-mail (Default/Send One Confirmation Only)
- Click Change E-mail to add or change the guest e-mail address. If a reservation is selected, the Change E-mail Address form opens. Complete the E-mail Address field and click the Save button to add/change the e-mail address on the confirmation form as well as the Guest Master. A reservation must be selected before adding/changing an e-mail address. If no reservation is selected when the Change E-mail button is clicked, a notice is displayed "No Reservation chosen. Please Find a reservation."
- Show Recipients
- Shown only when sending to more than one person (not the Send One tab), display the recipients based on the set filters on the Recipients tab. While the system searches the database, a message is displayed in blue: "Getting Reservations". This button is not displayed when sending only one e-mail.
- Check for Mail Server
- When getting the recipient list, the system will check for the existence of the mail server. The system contacts all outside domain names to verify their existence. This test can take a while, depending on the size of the E-mail database and there will be a small delay for each e-mail checked. However, it is recommended to run this test to determine if any e-mails in the database are inaccurate or obsolete.
- Send E-mail(s)
- Send e-mails based on the criteria entered. To stop sending, click the Stop button to the right of the Send E-mails button.
- Send Test E-mail
- View a sample of what your recipients will receive. Before sending a test, all mandatory fields must be completed.
- Stop
- Sending e-mails to a large group could take several minutes to complete. To stop the process, click the Stop button. This button is not displayed when sending only one e-mail.
E-mail Settings
- From
- Enter the e-mail address of the sender of the e-mail. If the recipient responds to the e-mail, this address will receive the reply. For more details, see default settings.
- Subject
- Enter the topic of the e-mail. For more details, see default settings.
- Body Report
- Enter the report name or click Browse to locate the appropriate system report to display in the E-Mail Body tab. For more details, see default settings.
- Defaults
- If changes have been made to the E-mail Settings fields, click Defaults to return that portion of the screen the default settings.
- Preview (Body Report)
- Once the Body Report is selected in the E-mail Settings, click the Preview button to display the grid in the E-mail Body tab.
Attachments
- Crystal Report Attachment
- Select a Crystal Report to be attached. To change the report, click on the down-arrow and select from the list. If a report is kept in a different folder, click the Folder button first to select the appropriate folder. Once the folder has been selected, the report list changes appropriately. To send an e-mail confirmation without an attachment, click the None radio button. All attachment detail is then disabled.
- Report Format
- Once a Report has been selected, the Crystal Report Format shows as PDF (Adobe Acrobat) unless otherwise specified. To change the format, click the Word radio button. Keep in mind that if the recipients receive a report in Word format, most users can then change the report. For example, when sending a confirmation with room pricing, the user could potentially reduce the rate, print it out, and give it to the Front Desk clerk at check-in. A Report sent in PDF form is not editable.
- Folder
- View the folder in which the selected Crystal Report resides. All report folders are kept in the RDPNT/RDP/Reports10 folder. Click any folder to change the setting. Once the folder has been changed, the list in Crystal Report displays the newly selected list of reports.
- Browse
- Locate reports to include in the body report and/or as an attachment.
- Preview (Crystal Report)
- Display the Crystal Report using the Reporter.
- Send the selected report to the printer. A Crystal Report must be chosen before previewing and/or printing. In addition, all other required fields must be fulfilled before printing.
- Additional Attachments
- Click the associated Browse button. Once the additional attachments have been selected and Defaults is clicked, the additional attachments must be reattached. The Crystal Report and its format will remain unchanged if Defaults is clicked.
- Remove (Attachments)
- If the selected attachments are no longer needed, select the unnecessary attachment from the drop-down list, and click Remove.
Recipients Tab
Display a list of e-mails based on parameter selections. If an e-mail is to be included or excluded from a filtered database, change the Send status manually by hovering over the Send field of a row. The drop-down arrow is available. Click the arrow and select Yes, No, or Sent. Fields displayed in the grid on the Recipients Tab are: Res#, Guest#, Name, Deposit, Arrival, TY (Reservation Type), Send (or Sent), Status, and E-mail. For help with sorting, relocating columns, and other options within the Grid, refer to
Grid.
E-mail Body Tab
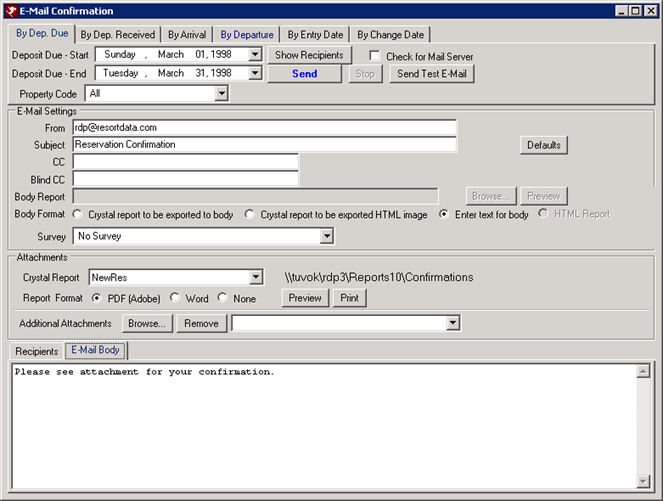
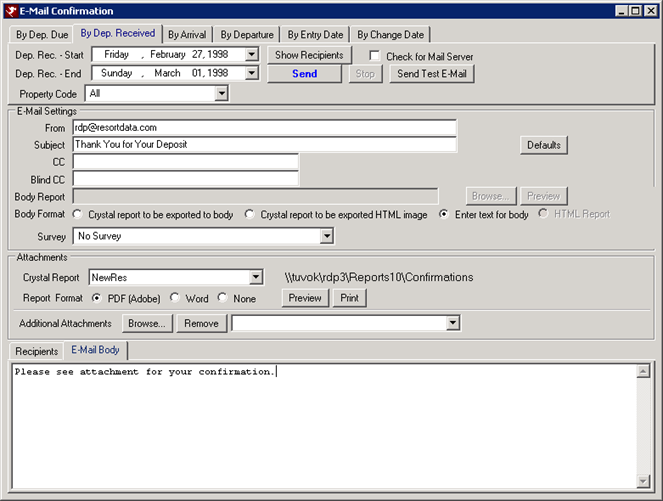
The body of the e-mail is populated by the defaults loaded in the Confirmation Configuration. This can be changed once by typing over the default text. However, the next time this screen is accessed, it will revert to the default setting. To change the default setting, access Confirmation Configuration from the Navigation Menu.
Send Using Filters
- Send One - Only Available for "Reporter Only" Mode
- Send a single e-mail confirmation. This option is available from the Confirmations menu only when the property's mode is " Reporter Only". For property's running RDPWin in any other mode, single confirmations can be sent using the right-click menu or by clicking Confirmation in the Reservations | Options menu.
- The label of this tab defined in
Configuration. Click the Find Res button to select a reservation. The system populates the Name, Res#, Guest# and E-mail boxes with the appropriate information for that reservation. If the selected reservation does not have an e-mail address, the system prompts with “No E-mail Address for this Guest. To send an e-mail, you must have an e-mail address. Add one now?”. If yes, the system displays the master edit screen for the selected guest. If no, the system cancels the selection of the reservation returns to the E-mail Confirmation Default Label tab. If the reservation selected is in the name of a group (perhaps a Tour Company Name), the system prompts with "No Guest for Reservation#." For assistance with fields in this filter, see above.
When running in any mode other than Customer Reporter Only, click on any reservation in a grid (Arrivals, In-House, or Departures) or use Find Reservation to select the reservation, then click Confirmation from Options.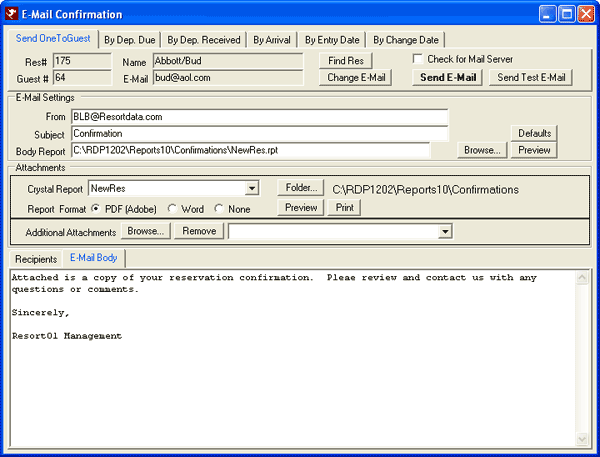
- By Deposit Due
- Send an e-mail confirmation to all reservations with an outstanding deposit by date of deposit due. The system checks the Deposit 1 field and the date the deposit is due. If the first deposit has been paid, it will check for reservations with a Deposit 2 due.
- There are two ways to select the Deposit Due date. Either select from the Deposit Due drop-down calendar by clicking on the down arrow; or select the month, day, or year and use the up/down arrows on the keyboard. The default is the current date. Only current or future dates can be selected, since a deposit should never be due in the past. For assistance with fields in this filter, see above.
- Property Code
- If the property code feature is enabled, the Deposit Due confirmations can be sent to a specific property code. Select the property code from the drop down, or leave the field with All and all property codes will receive the email. This filter is useful for customers with different confirmations based on the property code.
- By Deposit Received
- Send an e-mail confirmation to all reservations with a paid deposit on a specific date. There are two ways to select the Deposit Received date. Either select from the Deposit Received drop-down calendar by clicking on the down arrow; or select the month, day, or year and use the up/down arrows on the keyboard. The default is the current date. Only current or past dates can be selected, since a deposit is not considered received if the date is in the future. For assistance with fields in this filter, see above.
- Property Code
- If the property code feature is enabled, the Deposit Recevied confirmations can be sent to a specific property code. Select the property code from the drop down, or leave the field with All and all property codes will receive the email. This filter is useful for customers with different confirmations based on the property code.
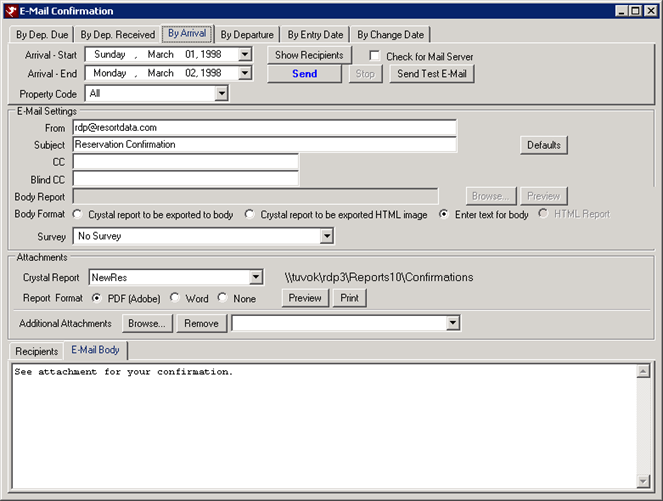
- By Arrival
- Send an e-mail confirmation based on an arrival date or a range of dates. There are two ways to select the Arrival - Start and Arrival - End dates. Either select from the drop-down calendar by clicking on the down arrow; or select the month, day, or year and use the up/down arrows on the keyboard. The default is the current system date plus one. For assistance with fields in this filter, see above.
- Property Code
- If the property code feature is enabled, the Arrival confirmations can be sent to a specific property code. Select the property code from the drop down, or leave the field with All and all property codes will receive the email. This filter is useful for customers with different confirmations based on the property code.
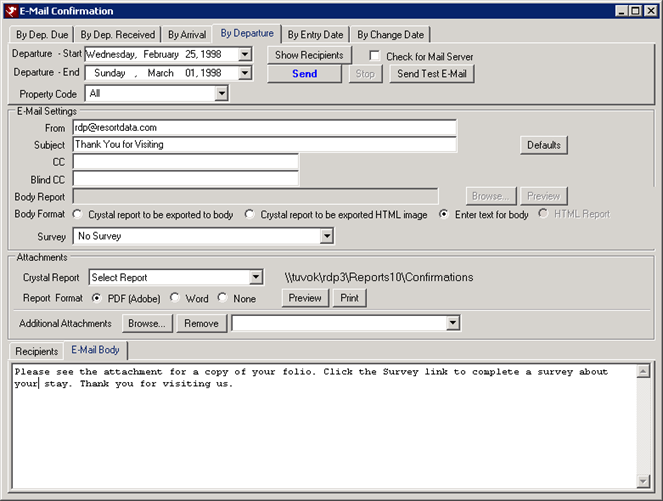
- By Departure
- Send an e-mail confirmation based on the departure date or date range. There are two ways to select the Departure - Start and Departure - End dates. Either select from the drop-down calendar by clicking on the down arrow; or select the month, day, or year and use the up/down arrows on the keyboard. The default is the current system date plus one. For assistance with fields in this filter, see above.
- Property Code
- If the property code feature is enabled, the Departure confirmations can be sent to a specific property code. Select the property code from the drop down, or leave the field with All and all property codes will receive the email. This filter is useful for customers with different confirmations based on the property code.
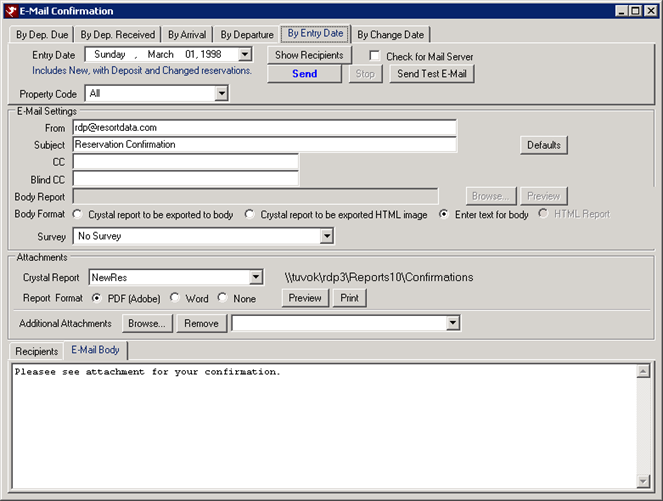
- By Entry Date
- Send an e-mail confirmation to all reservations based on "Entry
Date". Only current or past dates can be selected, since entries
cannot be made in the future. To select the date, either select
from the Entry Date drop-down calendar by clicking on the down arrow; or
select the month, day, or year and use the up/down arrows on the
keyboard. The default is the current date.
To view the list of e-mails, click the Show Recipients button. Reservations in a LEADER room are not included in the list.
The Recipients will then be displayed in the grid at the bottom for all reservations made on the day chosen that have a status of 1) advance reservation with no deposit, 2) advance reservation with deposit, or 4) advance reservation with changes. Note: Status 3 is not used. Cancelled, checked-out, in-house, and maintenance reservations are not shown in the Show Recipient display. For assistance with fields in this filter, see above. - Property Code
- If the property code feature is enabled, the Entry Date confirmations can be sent to a specific property code. Select the property code from the drop down, or leave the field with All and all property codes will receive the email. This filter is useful for customers with different confirmations based on the property code.
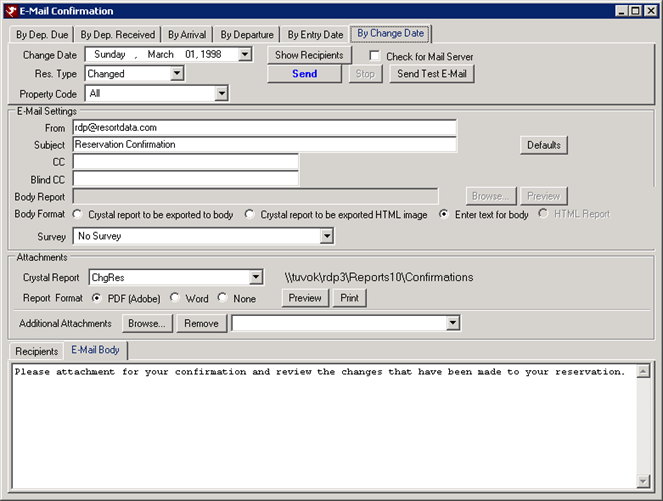
- By Change Date
- To send an e-mail confirmation to all reservations that changed on a specific date. There are two ways to select the Changed Date. Either select from the Change Date drop-down calendar by clicking on the down arrow; or select the month, day, or year and use the up/down arrows on the keyboard. The default is the current system date. Only current or past dates can be selected, since changes cannot be made on a future date. Select Changed from the Res. Type drop-down list. For assistance with fields in this filter, see above.
- Property Code
- If the property code feature is enabled, the Change Date confirmations can be sent to a specific property code. Select the property code from the drop down, or leave the field with All and all property codes will receive the email. This filter is useful for customers with different confirmations based on the property code.
Click these links for Frequently Asked Questions or Troubleshooting assistance.
09/05/2012
© 1983-2009 Resort Data Processing, Inc. All rights reserved.