- (Customer Relationship Management (RX) module required.)
Overview
View and print Customer Relationship Management (CRM) statements for a single guest or for all guests. Statements can be printed property and date.
Current Statements

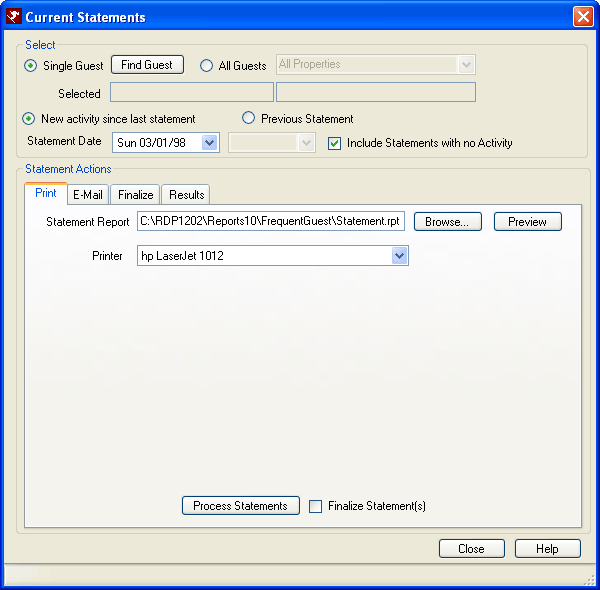
Select
- Single Guest
- View or print current statements for one guest. Click the Find Guest button. Enter the Frequent Guest Number, Name, or E-Mail Address and click the appropriate Find button. Highlight the frequent guest record and click the Select button.
- All Guests
- View, e-mail, print, or close current statements for all guests. Set the associated drop-down to All Properties to process all guests for any property, or select one specific property to process all guests for that one property.
- Selected
- View the Frequent Guest Number and Name when Single Guest is chosen or the property when All Guests is chosen. These fields are read-only and based on the All or Single Guest selection.
- New Activity Since Last Statement
- Select this radio button to process the current statements, for any activity since the last statement D@ marker. The date of the most recent statement processing is displayed in the Statement Date field.
- Statement Date
- The system auto-fills this field with the current RDP System date. Users can click on the down-arrow to display a calendar or type directly into the text box to change this date.
- Previous Statement
- Select this radio button to process the current statements for a specific prior statement. Once selected, use the associated drop-down to indicate which previous statement date to use.
- Include Statements with No Activity
- When checked, the system prints any current statements regardless of recent activity. To view and print only current statements with activity, uncheck the box. By default, this setting is checked.
Print Tab
- Statement Report
- Use the Browse button to specify the report to be used when displaying or printing current statements. The default setting is RDP\Reports10\FrequentGuest\Statement.rpt. Properties that create their own unique reports may enter their custom report path here. To set a default report, use the Configuration Miscellaneous tab.
- Browse
- Click the Browse button to search for the Statement Report.
- Preview
- Preview an example of what the statement will look like, click the Show Sample button.
- Printer
- Select the printer to where the statements are directed for printing.
- Process Statements
- To print statements, select the Process Statements button while on the Print tab.
- Finalize Statement(s)
- See Finalize Statements.
E-mail Tab
- Statement Report
- See Statement Report.
- Preview (Statement Report)
- See Preview above.
- Statement Report Format
- The Crystal Report is attached to the e-mail as either an Adobe PDF file or a Word File. PDF format is recommended since it is better protected against changes by the guest. Crystal Reports are not exported to HTML and/or included in the body of the e-mail because web based E-Mail, like Yahoo and Hotmail, alters the HTML to be unreadable. If sending a PDF confirmation, the Adobe website should be referenced (www.Adobe.com), since the PDF Reader may not be installed on all computers. This is a free download available on all computer platforms.
- Subject
- Enter the text to be displayed in the e-mail(s).
- Body Report
- Click the Browse button to designate the report to be used as the default body of the e-mail(s). RDPWin Crystal Reports are filed in the RDP\Reports10 folder.
- Body Text
- Enter the text to be displayed in the body of the E-Mail. This text should refer to the attached statement. The information can be entered or changed each time in the statement screen.
- Additional Attachments
- Click the Browse button on the E-mail tab to navigate to and select the other documents to be attached to the CRM Statement when emailed. Use the Remove button to deselect attachments.
- Process Statements
- To e-mail statements, select the Process Statements button while on the E-mail tab.
- E-Mail Statements
- To e-mail statements, select the E-Mail radio button. By default, this setting is set to Print. When E-Mail is selected, the E-Mail Settings area is enabled for further definition.
- Finalize Statement(s)
- See Finalize Statements.
Points Expiration Tab
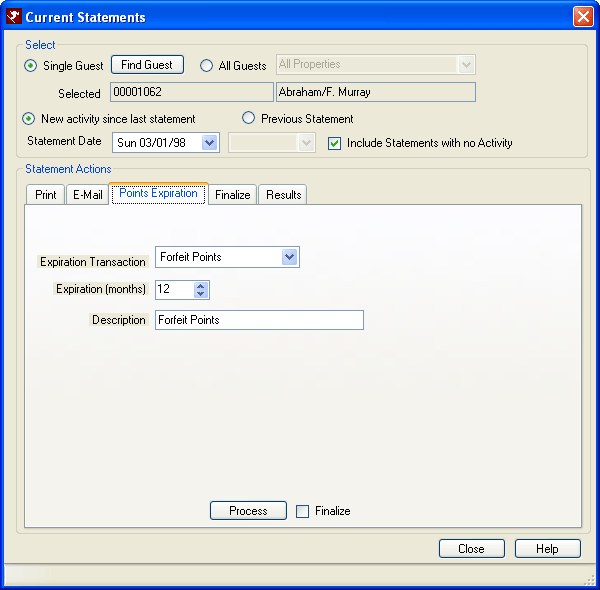
Points can be expired or forfeit if not redeemed within a certain amount if time.
When Single Guest is selected,
click Find Guest to choose an individual guest. When Single Guest is
selected and no guest has been chosen, a message displays when Process is
clicked. When All Guests is
selected, the configured properties are populated in the drop-down to allow
for one or all properties to be considered. In the sample screen
below, a single guest is selected.
- Expiration Transaction
- Select the appropriate Expiration Transaction from the drop down. Forfeit Points is the only Expiration Transaction available in drop-down by default, but others can be configured using the Transaction Types tab in CRM Configuration.
- Expiration Months
- Specify the time period using the up/down arrows or enter manually to set the expiration for unredeemed points to a certain number of months. The minimum months is set to one and the maximum is 100.
- Description
- The Description field is automatically filled with the Description from the Transaction Code on the Transaction Types tab in CRM Configuration. The description text can be changed.
- Process
- Click Process to mark points as expired based the filters set.
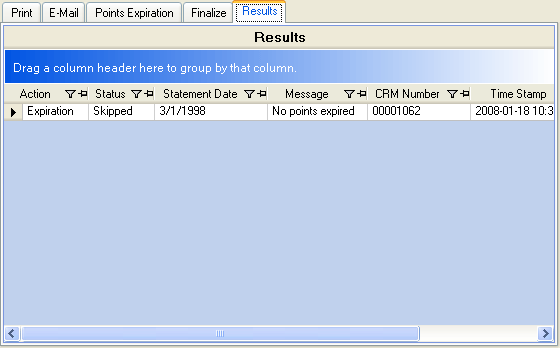
The status of all selected guests's points is displayed on the
Results tab.

Note: When membership levels are configured, expired points are subtracted from the cumulative balance on the Points tab and the membership level is downgraded when applicable. - Finalize
- After processing expired points, print or e-mail statements , and check the Finalize box on either the Points Expiration tab or the Finalize tab. Even when statements are not printed or e-mailed, finalizing is still recommended. When expired points are processed again (at a later time), only points transactions since the last finalization are processed. When statements are not finalized, all point transactions are considered which causes finalization to take a considerably longer processing time.
Finalize Tab
- Process Statements
- To close statements, select the Process Statements button while on the Close tab.
- Finalize Statement(s)
- Check the box and click Process Statements finalize the statements for the selected date range.
Results Tab
Once processing is complete, click on the Results tab to review the Status column of the grid. If any statement is not closed, the Status column equals "Skipped."
Click these links for Frequently Asked Questions or Troubleshooting assistance.
04/07/2011