** Refers to new or updated subjects in this tutorial.
Specific references within this tutorial to specific screen displays may differ if data/demo files have not been updated. It is advised that users get new data files before beginning a tutorial.
Surveys (Guest Survey & Communication Module SK Required)
When the Guest Survey & Communication Module SK is installed, create surveys to be sent to reservation guests, guest history, and owners (owners requires the Condominium Owner Accounting Module R3 be installed). Use the following steps to create and associate surveys.
- Create a Survey
- Add/Change Sections/Questions
- Associate the Survey with a Confirmation
- Send the Survey
- View the Statistics
- View Points
Create a Survey
- Using RDPWin, select Surveys -> Configuration from the Stats main menu. This is also available by clicking the Configuration option from the Surveys submenu on the Statistics introduction screen.
- To create a survey, click the Add button on the Surveys screen.

-
- Select the Survey Type.
- Enter the survey Description. This identifies the survey when selecting surveys to send to recipients.
- Set the range for the radio buttons. For example, a survey question might ask the recipient to describe their stay on a scale of 1 to 5 or 1 to 10. This scale is the radio button range. Skip this step when radio buttons are not part of the survey.
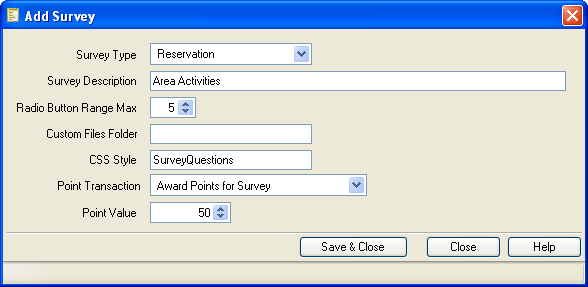
- Define the Custom Files Folder.
- Select the CSS Style.
- Awarding points for completing a survey requires the Customer Relationship Management (CRM) Module RX be installed. Visible only when the CRM Module is installed, select the appropriate Point Transaction.
- Visible only when the CRM Module is installed, set the Point Value to award when the recipient completes the survey.
- Save & Close when complete.
Add or Change Questions in a Particular Survey
- Once a survey is created, select that survey from the Survey drop-down list and click Display.
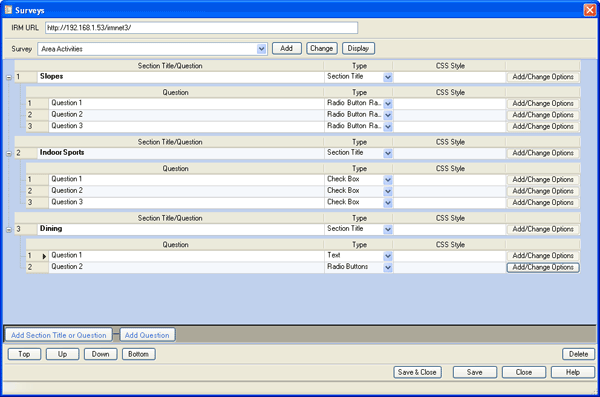
- Click the "Add Section Title or Question" button.
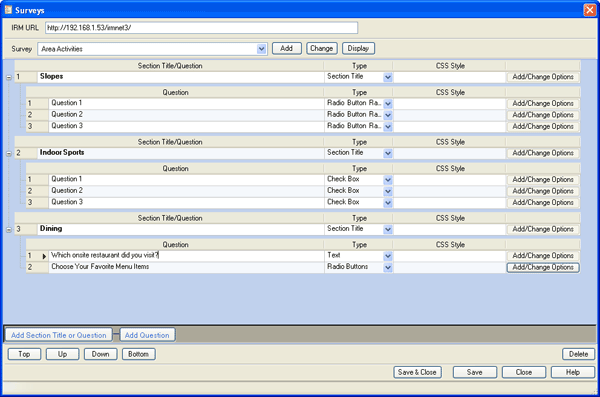
- Enter all section titles and questions for each section making sure to select the Type, identify the Style.
- For questions that have options, click the Add/Change Options button to access the Survey Options screen for each question.
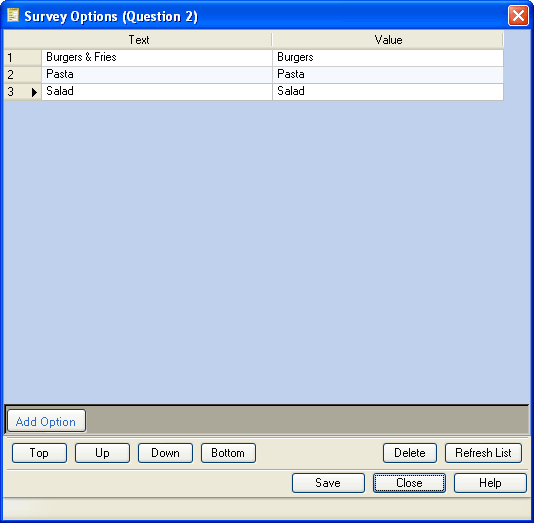
- Click the Add Option button and enter the text and value for each option. Rearrange the order of the options using the Top/Up/Down/Bottom buttons. Click Save and then Close when complete.
- Continue to add sections and questions until the survey is complete, then click Save & Close.
Associate a Survey with a Confirmation
To send surveys with confirmations and/or reports, the survey must first be associated with a confirmation.
- Select the Confirmation Associations tab from the Reporter/Configuration menu.
- Select the Master to be associated with the survey by double-clicking the row or highlighting the row and clicking the Change button. In this case, use Master=Res and Confirm Type = Confirm1.
- Select the appropriate survey from the Survey drop-down list as shown below.
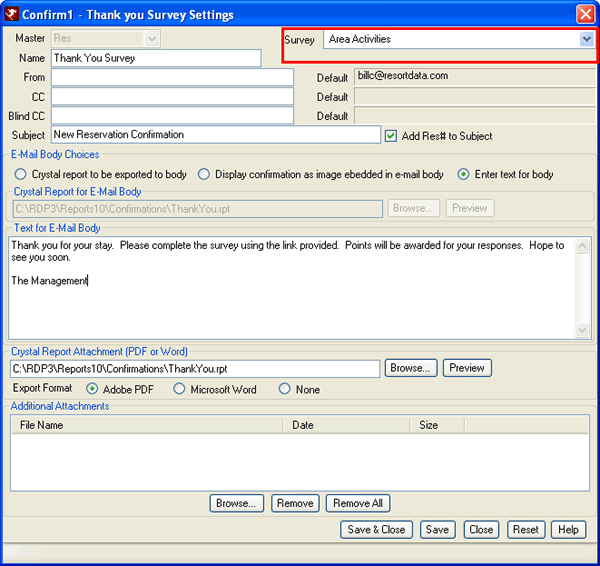
- Assign a name, enter a subject matter, select "Enter Text for Body", enter the text to be included in the email, and select the Crystal Report Attachment report to be included with the email.
- Click Save & Close.
Send Confirmations with Surveys for a Particular Reservation
- Select a reservations using Find Res or by selecting a reservation from one of the status grids (Arrivals, In-house, Departures).
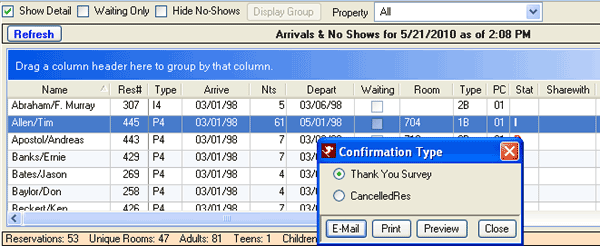
- Right-click the reservation and select "Email or Print Confirmation".
- Select the Confirmation Type using the name assigned in the Association process above.
- Confirm or enter the email address of the recipient (Click Change Email to enter) and the sending (From). The rest of the information should be completed based on the Association process.
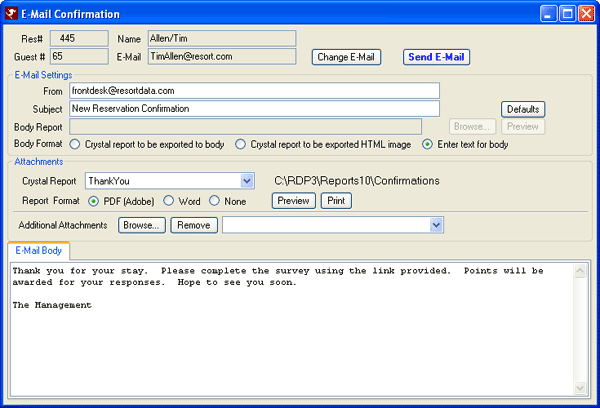
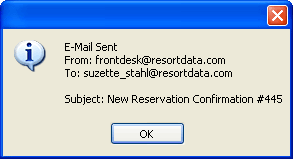
- Click the "Send Email" button when ready. A confirmation notice displays when the process is complete.
- The email received should resemble this:
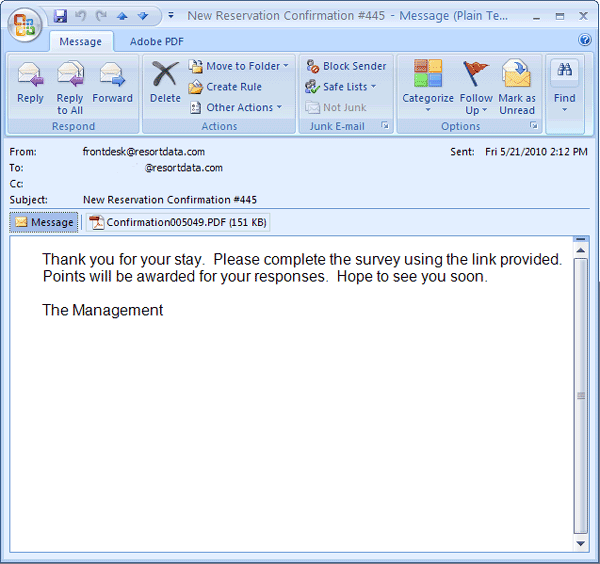
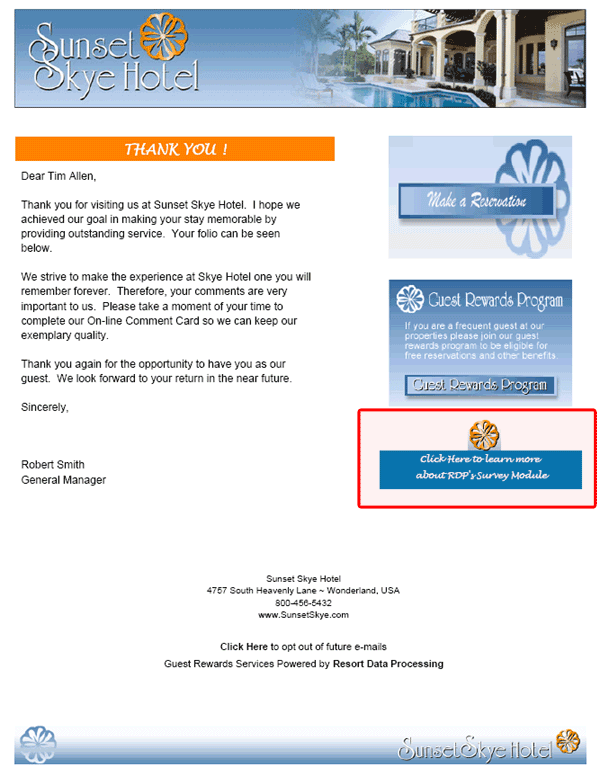
- The recipient should open the attachment to access the survey. In the styling of the survey itself, the email should somehow direct the recipient to click on a link to access the actual survey via the IRM.Net. A sample is shown below with the link section highlighted in red.
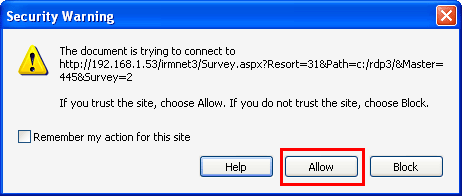
- Some systems, based on individual security settings, may be required to "Allow" access to the site.
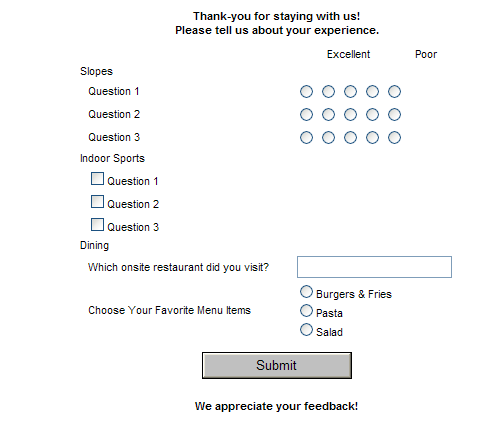
- Once allowed, the survey should display such as the sample below. The recipient should complete the survey and click Submit.
Survey Statistics
Statistics are calculated and saved for each configured survey. The Description, number of surveys sent out, number of completed surveys received and a progress bar show the results in great detail. The survey sections and associated questions can be viewed. Charts can be viewed and printed to help with reporting for marketing and management use.
In the sample below, two surveys have been configured: a Departure Survey and an Area Activities survey. The Area Activities survey details are displays. One survey was sent out and completed. One of the Dining questions is highlighted and the response is detailed in the chart.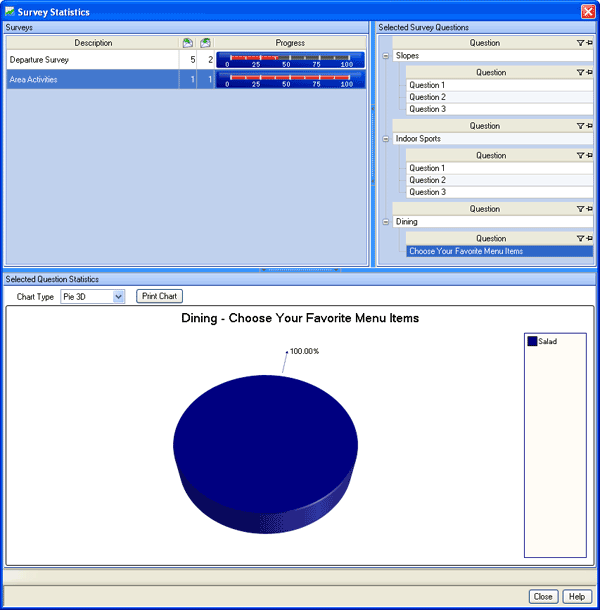
Points Awarded
Awarding points for completing a survey requires the Customer Relationship Management (CRM) Module RX be installed. When installed and the survey responses are received, the recipient (person who completed the survey) receives points for the survey as shown below. 
Click here for the Tutorials Index.
Click these links for Frequently Asked Questions or Troubleshooting assistance.
05/25/2010
© 1983-2009 Resort Data Processing, Inc. All rights reserved.