Click here for Audit tutorials
Click here for a complete list of Audit Procedures
| Credit Card Topics |
|---|
Overview
RDPWin Version 3 and higher uses Protobase to transmit daily credit card deposits
to the property's bank. Credit card transactions are generally finalized
with the credit card provider on a daily basis by running a batch wherein
all credit card transactions for the day are transmitted to the credit card
provider. This transmission, approval process is referred to as a
"batch" (all transactions since the last time a batch was run).
Use the following steps to batch out:
- Log into the Protobase User Interface. Login: (PB username). Password: (PB password).
Type local in the Connect to: field, and click
Login.
The following screen displays: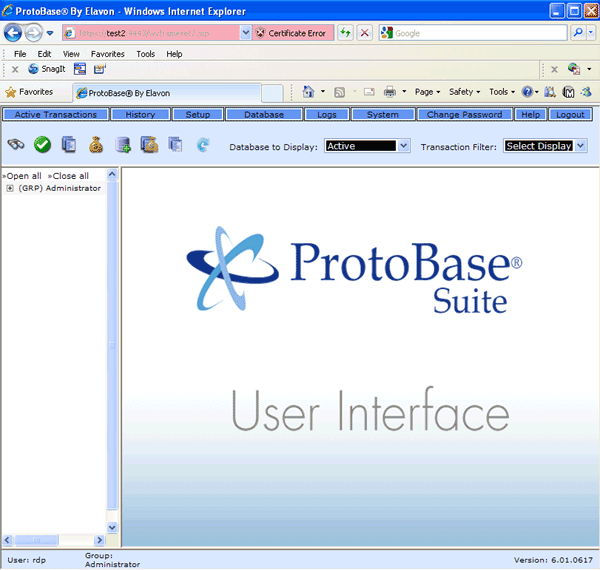
- Click the check mark with green background to select transactions.
- Click Select.
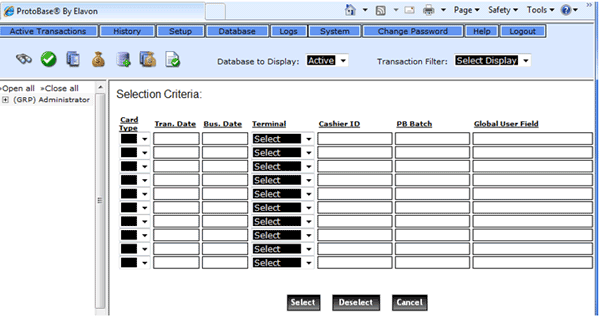
- Click OK at the popup message saying how many records were selected.
Transactions will display.

- Click the Reports icon
 (between green check and money bag) to create
a transaction report. The Report Criteria screen displays.
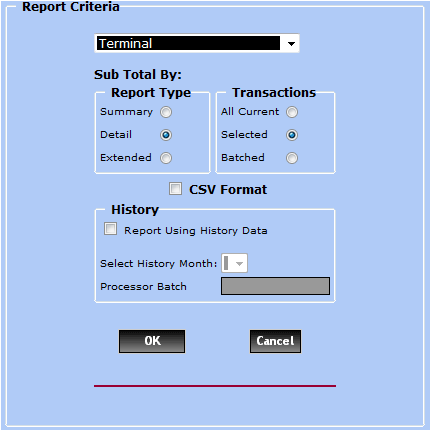
- In the Select Report drop-down, choose Terminal.
- Select the Detail and Selected radio buttons.
- Click OK. The Terminal Report is displayed in another tab
or window. When a certificate error exists, it may be necessary to
click
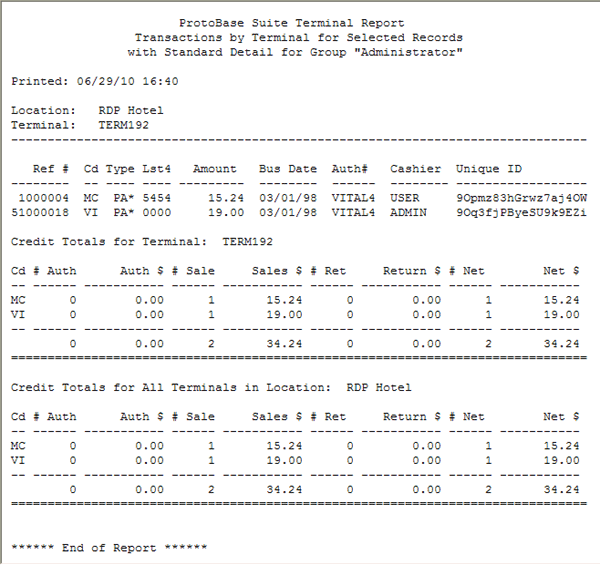
- Right-click the generated report and select Print so the report can be compared.
- Compare the printed report from Protobase to the printed report from RDP (CreditCardPayments) which should match. If not, compare the detail to find the discrepancy.
- When matching, click the Money Bag icon
 to begin batch. The Settle
Transactions window displays.
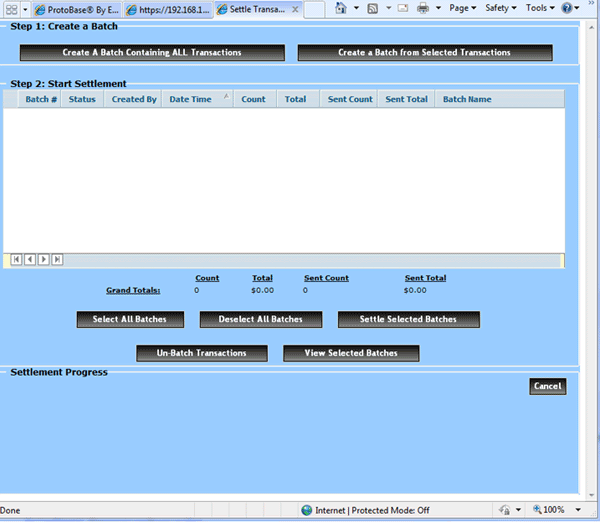
- Click Create a Batch from SELECTED Transactions. If prompted for a Batch Name, use YYYYMMDD naming convention (i.e., June 1, 2010 is 20100601).
- Check the appropriate box for the selected batch to be settled.
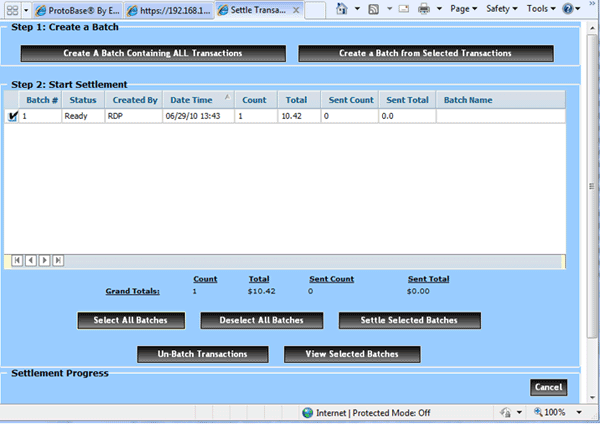
- Click Settle Selected Batches.
- Click OK at the "Start Settlement?" prompt.
- Click OK at the "Settlement has successfully launched" prompt.
- Click Close. The settlement takes a few minutes. When it
is complete, the
 Get Settlement icon appears in the Navigation Panel.
It may be necessary to refresh the screen by clicking to another tab and
then back again.
- Click on the Get Settlement icon to view Unviewed Settlement
Reports.
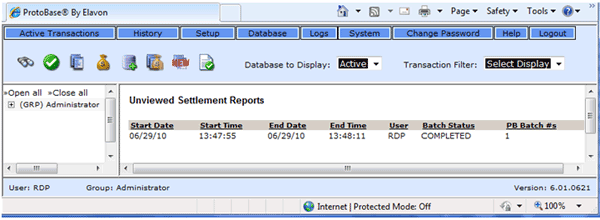
- If the settlement is successful, the Batch Status displays COMPLETED.
- Click on the Start Date field to view the report. The Overall
Settlement Status should show "Passed – Complete".
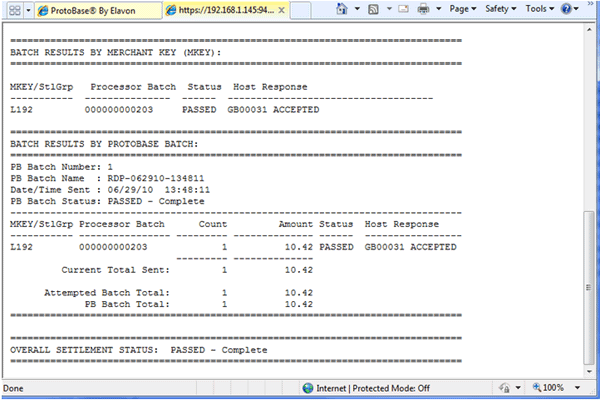
- Right-click and print the final report.
Click these links for Frequently Asked Questions or Troubleshooting assistance.
06/29/2010
© 1983-2009 Resort Data Processing, Inc. All rights reserved.